Instructions & Cleaning
Click on the links below to download detailed instructions on cleaning your concession machines after use.
Over garbage can, dump out all unused sugar from the machine. Wipe off the machine with soap and water.
DO NOT USE ANY WATER ON THE INSIDE OF THE MACHINE ITSELF
Hose out dome and tub with water to remove all sugar.
INTRODUCTION
- Please read instructions before using
- Clean machine thoroughly before and after all uses using cleaning instructions below
- This machine will be HOT during use and for a short time after it is turned off – BE CAREFUL
SAFETY INSTRUCTIONS
- Plug the electrical cord into a certified electrical outlet with a corresponding voltage rating as listed on the machine model labels. Units with two cords must be plugged into outlets on individual branch circuits.
- There is one motor in the units that have one on/off switch.
- There are two motors in units that have two on/off switches. The left switch controls the rotation of the front set of rollers and the right switch controls the rotation of the rear set of rollers.
- On units with two temperature controls, the left dial controls the front half of the rollers which are denoted by black bearings. The right dial controls the rear rollers which have white bearings.
- Units with four temperature controls operate from left to right across the front panel.
- Switch #1 controls the heat in the front four rollers 1-4 which are designated by black bearings.
- Switch #2 controls the heat in the next four rollers 5-8 which are designated by white bearings.
- Switch #3 controls the heat in the next four rollers 9-12 which are designated by white bearings.
- Switch #4 controls the heat in the next four rollers 13-16 which are designated by black bearings.
PREPARATION
- Set unit on a flat surface
- Position unit near the power outlet. Avoid the use of extension cords.
- Clean the unit thoroughly before use.
- If the unit fails to operate properly when first installed call Metz Amusements 610-863-4914.
STARTUP
- Turn on/off switches to the on position and make sure rollers are turning.
- Turn temperature controls to the desired temperature –
• Knob setting #2: temperature is at 150º; HOLD
• Knob setting #4: temperature is at 180º; HOLD
• Knob setting #8: temperature is at 220º; COOK
• Knob setting #10: temperature is at 300º; PREHEAT
- Allow rollers to heat for 5 to 10 minutes before placing the product on rollers.
- Plastic tongs are included with units with Gripsit rollers. Use plastic to prevent serious damage to these rollers. Never use metal utensils or tools on the Gripsit rollers.
ELECTRICAL REQUIREMENTS
Refer to the product tag (serial plate) on the back of the unit for voltage and wattage requirements. Be sure to plug the unit into an outlet with sufficient power.
OPERATION
- During slow sales periods, turn rear rollers on low heat and fill rollers with the product. Keep front rollers on medium and serve products from there. Shift product from the rear to the front and reload.
- During busy periods, set rear control to medium and front control to high. Serve from the front rollers first.
- During very busy periods, set all thermostats on high. Fill all of the rollers with the product. At this temperature, the product should be sold within 15 minutes.
IMPORTANT: Never serve product from low heat if not approved by the health department.
NEVER CHANGE PRODUCT FROM HIGH TO LOW HEAT AS THIS CHANGE IN TEMPERATURE CAUSES THE PRODUCT TO SHRIVEL.
CLEANING
- Turn temperature controls on high and turn rollers on before cleaning.
- ALWAYS START AT THE END OF THE ROLLERS AND WIPE TOWARD THE CENTER. This prevents extra grease from entering the sides of the unit and into the bearings.
• Use a soft cloth to wipe the rollers clean. If the build-up on the rollers cannot be removed by just wiping with a wet cloth, use a sponge scrubber. - After cleaning the rollers, remove the drip pan and clean it with mild soap and water.
PLEASE BE SURE ALL ITEMS ARE RETURNED TO METZ AMUSEMENTS INCLUDING TONGS AND IF THERE IS A COVER ON YOUR PARTICULAR UNIT. IF ITEMS ARE NOT RETURNED AND/OR CLEANING OF ITEMS, YOU MAY INCUR ADDITIONAL CHARGES.
Popcorn machine cleaning is a fairly simple process when you follow these steps:
Unplug the machine. This will ensure that no shocking incidents happen. Allow the machine to cool from 30 minutes to an hour. The cooling-off period will help prevent burns, as the temperature on these poppers must be extremely high to pop the kernels.
Unplug and remove the kettle from the unit by turning the plug slightly and pulling straight down, then wipe it down with a damp towel or sponge. Never submerge a kettle in water. It may damage the electrical components.
Wipe down the interior glass surfaces of the popper with a non-ammonia based cleaner.
Wipe down any interior stainless steel surfaces, such as the heating deck, with a moist towel.
Ensure that any surface that touches food is cleaned with a cleanser that is safe for food. It is preferred that you use just dish soap and water.
Wipe the outer surfaces with a damp cloth for metal surfaces and a food-safe glass cleaner for the panes of glass.
ANY QUESTIONS, PLEASE CONTACT METZ AMUSEMENTS at 610-863-4914.
Safety Precautions
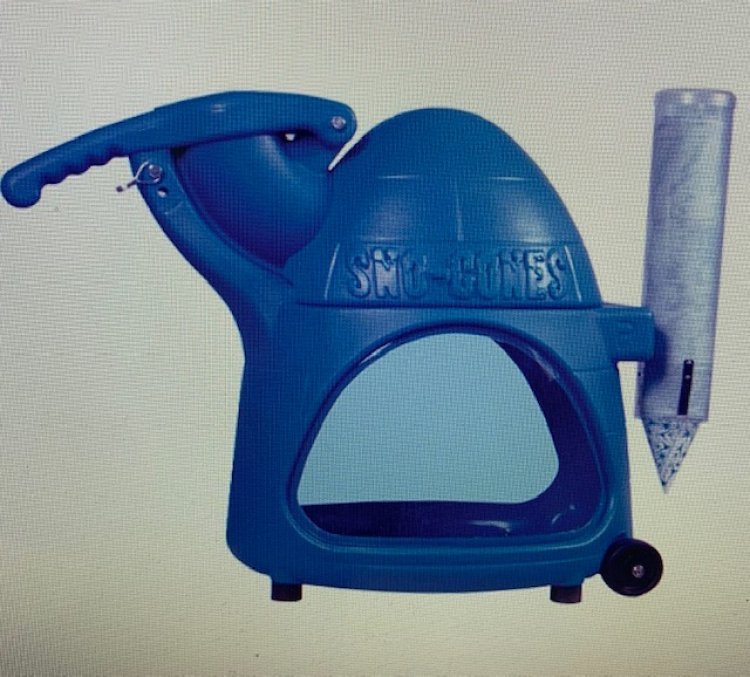
- The Sno-Cone Machine can take ice cubes or blocks of ice broken into pieces approximately 3″ – 4″ in size. The ice will not fit in the shaver if the pieces are too large.
- The design of the shaving chute automatically draws the ice against the blade. There is no need for manual effort.
- Only plug rented snow cone machine into a grounded outlet of appropriate volts and amps.
- Keep fingers and hands away from the shaving unit of rented snow cone machine when the motor is running.
- Insert only ice into the rented snow cone machine’s ice-crushing compartment.
Setup
- Place the rented snow cone machine on a stable, level surface, such as a table or counter.
- Make sure to set up the snow cone machine near a grounded, electrical source so that you will not need to use an extension cord unless approved by the machine’s manufacturer.
Operation
- Make sure to put the drain tube in a bucket or other area that can accept any draining liquid from the machine.
- Plugin and turn on the snow cone machine.
- Lift the snow cone machine’s handle and fill the shaver body, also known as the gooseneck or hopper, about an inch from its top with 3- to 4-inch ice cubes.
- Push the pusher handle down against the ice in the chute. Apply firm and even pressure to make the best snow (too much pressure will result in the snow that is coarse; too little pressure will make the snow mushy).
- Scoop ice into the snow cone container and pump an amount of flavored syrup correct for the container’s size onto the ice.
- When finished using the rented snow cone machine, turn off switches.
Cleaning
- Wipe all water and any syrup off of the inside and outside of the cabinet. Do not wash or immerse in water.
- Clean the ladle, bottles, caps, and pour spouts. BE SURE THAT ALL ITEMS ARE RETURNED TO METZ AMUSEMENTS TO AVOID ADDITIONAL REPLACEMENT CHARGES. This includes the bottles, white caps, pourers, ladle and any other items that may have been given such as bucket, carrier for syrup bottles, and/or snow cone stands. You are not required to returned unused syrup or snow cone cups.
Required Items:
- Spinart Machine
- Card Stock
- Paint Bottles with Paint
Electrical Requirements:
- Normal amp draw for the Spinart Machine is 120 volts is 9 amps.
- The power supply cord is equipped with a machine ground (the tubular prong). For safety, always plug the machine into a grounded receptacle.
Operating Instructions:
- Place the machine on a sturdy table or countertop with the controls facing the operator and the
- Plexiglas lid opening facing the user.
- Turn the switch in the back to the “On” position. Note: The FUN Spinner will not rotate while the lid is
- up.
- Place the card stock on the bracket inside the machine.
- Lower the lid. Upon lowering the lid, the spinner will start to turn.
- Using one bottle of paint at a time, drip the paint through the slot in the clear lid. Note: Use only a small amount of paint to avoid ruining the work and causing a mess.
- Movement of the paint up and down the length of the slot creates the best results. 2-3 Colors usually provides the best result. Using more than 3 colors often results in a brownish tone to the entire work.
- When satisfied with the painting, gently raise the lid and wait for the spinning to stop.
- Remove the card stock and place it on a table or counter and allow it to dry.
Shut Down Procedure:
- Turn the power switch to the “off” position.
- Unplug the machine.
- Remove the paint bottles from their holders and wipe clean.
- Wipe up all paint inside the machine, including paint that may have built upon the bracket.
- Wipe the lid and outside of the machine and remove all paint spills and splatters.
- Replace paint bottles in their holders
PLEASE REMEMBER THAT IF MACHINE IS NOT CLEANED AND IF ALL BOTTLES ARE NOT RETURNED TO METZ AMUSEMENTS, THERE MAY BE A CLEANING/REPLACEMENT CHARGE.
Need help, contact us!

